Light garden waste such as grass clippings, weeds, dead flowers, prunings, homegrown fruit and vegetables, light twigs and branches can be placed in the brown bin.
Bin Rental: Your Landscaping Waste Guide
Author
Terri Sander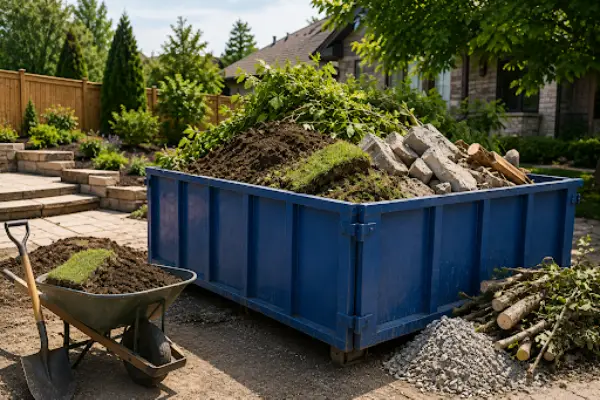
Anyone who’s worked on an old lawn knows how enormous the mess could get at times. This is primarily because broken elements in such works might not fit your bin as well.
This is where a lot of homeowners get caught off guard.
While everyone has an afterplan, no one knows where to keep the extra stuff that comes out from yards.
That’s exactly why bin rental Georgetown services exist, and why understanding your disposal needs before you break ground can save you a serious headache halfway through the project.
Read further to know more!
Table of Contents:
Why Landscaping Waste Is Different From Regular Yard Waste
Your weekly curbside pickup is designed for grass clippings, a few bags of leaves, and maybe a small bundle of twigs. It was never designed for the amount or type of debris a real landscaping project produces.
Think about what actually emerges out of a mid-sized backyard renovation:
- Sod strips, often still wet and heavy with dirt
- Excavated dirt and clay from landscaping or trenching
- Tree limbs, stumps, and root masses
- Old fencing, timber edging, or decayed deck boards
- Broken concrete, patio stone, or paver base materials
- Gravel, sand, and construction debris from a new patio or deck project
None of that belongs in your regular bin, and most municipalities won’t accept it. Trying to sneak large loads into weekly pickup usually just means it remains at the curb, uncollected, while your neighbours wonder what’s going on.
Estimating Debris Volume Before You Start
One of the biggest planning mistakes is estimating at how much waste a project will produce, then scrambling when the pile is twice the size expected. A little math up front goes a long way.
Quick Ways to Estimate
- Measure the footprint. For sod removal, multiply the length by width of the area, then consider in depth (usually 2 to 4 inches once roots and soil come up with it).
- Think in cubic yards, not bags. Contractors measure dumpsters in cubic yards, so converting your square footage into volume early makes ordering the right container much easier.
- Account for soil expansion. Excavated dirt actually takes up more space once it’s dug up than it did compacted in the ground. Add 20 to 30 percent to your calculation.
- Don’t forget hidden debris. Old patios often have a gravel or sand base underneath that adds significant weight and volume once it’s removed.
As a rough guide for smaller residential jobs:
| Project Type | Typical Debris Volume |
| Sod removal (500 sq ft) | 2 to 3 cubic yards |
| Small tree/stump removal | 1 to 2 cubic yards |
| Patio demolition (200 sq ft) | 3 to 5 cubic yards |
| Full backyard overhaul | 8 to 15 cubic yards |
These numbers vary depending on soil type, depth of excavation, and how much old material is being removed, but they’re a solid starting point when deciding what size bin to reserve.
Separating Clean Fill From General Yard Waste
Here’s something that confuses a lot of homeowners: not all debris is treated equally, and mixing it together can cost you more.
Clean fill refers to material like soil, sand, gravel, brick, and concrete that hasn’t been contaminated with garbage, chemicals, or organic waste. Many disposal facilities process clean fill differently than they do general waste, and sometimes it’s even repurposed for grading or construction elsewhere. Keeping it separate can mean lower disposal fees and quicker processing.
General yard waste, on the other hand, includes sod, branches, leaves, and other organic debris. This typically gets composted or mulched rather than sent to a landfill, but again, it needs to be free of soil, plastic, and construction waste.
A simple method:
- Use one bin (or a designated section of a large one) strictly for soil, concrete, and rock
- Keep organic material like sod and branches in a separate container
- Never mix construction debris like old lumber with nails still in it into your green waste
If your project is large enough to need two containers, this separation alone can noticeably reduce costs since clean fill disposal is often priced differently than mixed waste.
Timing Disposal Around Project Phases
Landscaping and construction projects move through distinct phases, and matching your bin rental Georgetown schedule to those phases keeps your yard from turning into a chaotic worksite.
Demolition Phase
This is when old sod comes up, patios get broken apart, and structures like old decks or fences collapse. Debris volume peaks here, so this is usually when you want your biggest bin on site.
Grading and Planting Phase
Excess soil often gets moved around during this phase. If you’re bringing in new topsoil, you may have leftover old soil that still needs to be removed. A smaller secondary bin, or keeping the first one a bit longer, tends to function well here.
Final Cleanup Phase
Once planting, mulching, and hardscaping wrap up, there’s usually a final wave of scraps, packaging, offcuts of lumber, and leftover stone. A short-term bin rental at the end of the project completes everything together without leaving debris scattered around your finished landscape.
Ordering a container for each phase, rather than one bin sitting there for the entire project, often makes more sense practically. It also keeps your yard clearer and safer for workers and family alike while the project is ongoing.
Choosing the Right Bin Rental Georgetown Service
When it comes time to actually reserve a container, local knowledge matters more than people expect. A company familiar with the area understands typical soil conditions, common project sizes, and where debris ultimately needs to go for disposal.
Hersey Bins, a family-run Ontario company, is one option homeowners in the area consider for landscaping and yard projects. They offer bin rental Georgetown residents can book for everything from a straightforward sod removal to a full patio and deck rebuild, which makes it easier to match container size to the specific phase of your project rather than choosing for a one-size-fits-all approach.
Whoever you choose, inquire about:
- Available bin sizes and what fits in your driveway or parking area
- Whether they separate clean fill from general waste, or if you do so
- Rental duration and whether you can extend it if the project runs long
- Weight limits, since soil and concrete are far heavier than yard waste
Wrapping Up
Landscaping waste is one of those things that’s easy to misjudge until it’s piled up in the driveway with nowhere to go. Taking a bit of time before the project starts, estimating your debris volume, separating clean fill from organic waste, and timing your bin rental Georgetown booking around demolition, planting, and final cleanup, makes the entire process easier from start to finish.
Moreover, getting this part right means less stress, fewer surprise costs, and a yard that actually looks complete when the work is done, instead of half-buried under leftover sod and broken concrete. If you’re planning a landscaping project in the area, take a few minutes to map out your disposal needs before the first shovel touches the ground. It’s a small step that saves a lot of hassle later.
FAQs
Which bin should I put grass in?
How should waste bins be maintained?
A fundamental step in maintaining a clean waste bin is regular emptying. Overflowing bins create a perfect environment for bacteria and pests.
How to dispose of top soil?
You can take garden soil to a recycling centre. Please transport it in robust sacks.
What can I put in my green bin to prevent maggots?
You can absolutely take steps to minimize your maggot infestation — add grass clippings, basil, coffee, or citrus peels to your green bin, or freeze your waste until collection so there’s less time for flies to lay eggs
Latest Blog