Rutabaga can be grown by using seeds.
Rutabaga Guide: Care Tips, Taxonomy, Growing Steps, Ideal Growing Conditions, & Much More!
Author
Rashika GuptaReviewed By
Cody Allison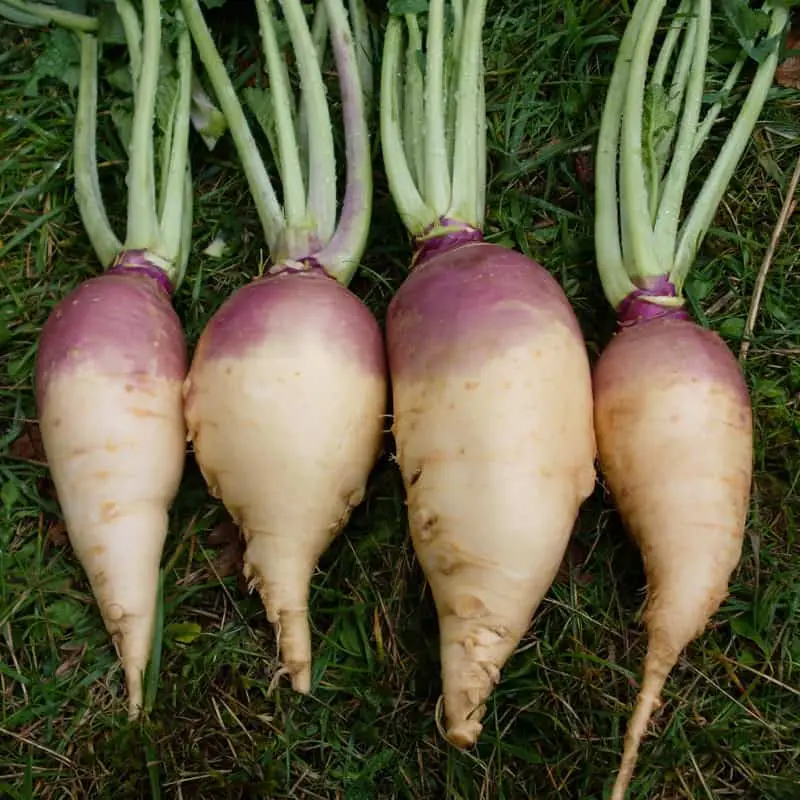
Rutabaga is a root vegetable that belongs to the mustard family. It is cultivated for its edible leaves and fleshy roots. This biennial vegetable is a great source of fibre, vitamin C, and potassium.
The rutabaga plant is a cool-season crop that requires a long growing season due to its slow growth. It originated in the gardens as a hybrid between a turnip and cabbage.
Read the article to learn more about rutabaga plant growing steps, care tips, taxonomy, ideal growing conditions, and much more.
Table of Contents:
How to Grow Rutabaga?
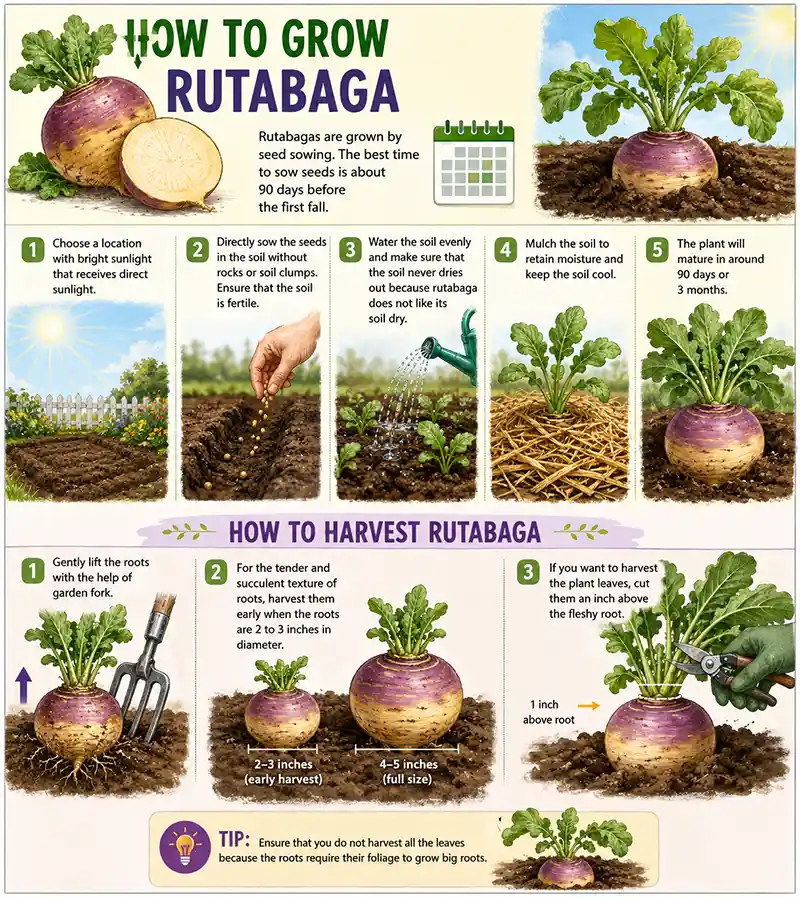
Rutabagas are grown by seed sowing. The best time to sow seeds is about 90 days before the first fall. The plant seeds should be sown directly in deep, fertile, and loose soil. Here is the step-by-step process of growing a rutabaga plant:
- Choose a location with bright sunlight that receives direct sunlight.
- Directly sow the seeds in the soil without rocks or soil clumps. Ensure that the soil is fertile.
- Water the soil evenly and make sure that the soil never dries out because rutabaga does not like its soil dry.
- Mulch the soil to retain moisture and keep the soil cool.
- The plant will mature in around 90 days or 3 months.
How to Harvest Rutabaga?
Harvest the roots when they are about 4 to 5 inches in diameter. Here are a few steps you need to follow while harvesting the rutabaga:
- Gently lift the roots with the help of garden tools.
- For the tender and succulent texture of the roots, harvest them early when the roots are 2 to 3 inches in diameter.
- If you want to harvest the plant leaves, cut them an inch above the fleshy root.
Tip: Ensure that you do not harvest all the leaves because the roots require their foliage to grow big roots.
How to Store Rutabaga?
To store rutabagas, cut off the foliage to within 1 inch of the crown with a knife. Wash off the soil and completely dry the root for a day in a cool area. Store the roots in a plastic bag in the refrigerator.
If stored properly, the roots last for around three to four months.
Did you know?
- The name “rutabaga” is Swedish and means “root bag.”
- Rutabaga is low in calories and has high fiber.
Read more: How to Grow Swiss Cheese Plant: Care Tips, Varieties, Pests, Diseases, & Problems Associated
Taxonomy and Ideal Growing Conditions for the Rutabaga Plant
Rutabaga is a root vegetable that is usually referred to as a turnip. They have a waxy, smooth skin and a yellow or white flesh with a slightly sweet, bitter flavour.
It belongs to the genus Brassica. For a quick taxonomic overview and ideal growing conditions, have a glance at the table given below:
| Botanical name | Brassica napur var. napobrassica |
| Common names | Swedish turnip, rutabaga, swede |
| Kingdom | Plantae |
| Order | Brassicales |
| Family | Brassicaceae (mustard family) |
| Genus | Brassica L. (cabbage and mustard genus) |
| Species | Brassica napur L. (Rapeseed, canola, and rutabaga) |
| Native area | Scandinavia and Russia |
| Hardiness | 2 to 9 USDA Zones |
| Light Requirements | Full, direct sunlight |
| Maintenance | Low |
| Plant type | Biennial |
| Soil | Well-drained, rich, moist chalk, sand, loam, clay soil with alkaline or neutral pH levels |
| Water Requirements | Average |
| Mature size | 0.1 to 0.5 metres tall and wide |
| Fertilizers | Balance fertilisers |
| Toxicity | Non-toxic |
| Tolerance | High cold and frost tolerance |
Read more: Red Creeping Thyme: Features, Landscaping Usage and Care Tips of the Ground Cover
Rutabaga Plant Care Tips
Rutabaga is known as a low-maintenance, slow-growing plant. Here are some of the care tips that will help your root vegetable grow healthy:
- Ensure you grow rutabagas by planting seeds directly in the ground in late summer.
- Choose a location that receives around 6 to 8 hours of direct sun daily.
- Use loose, well-draining, rich loam soil with pH levels between 5.5 and 7.
- Mix the organic compost before planting.
- Never start seeds indoors because rutabaga dislikes disturbance.
- Water the plant weekly about 1 to 1.5 inches deep. Ensure that the soil is evenly moist and does not dry.
- Adding mulch around the roots helps keep them cool and retain moisture.
- Thin seedlings about 4 to 6 inches apart.
- Harvest the roots when they reach around 3 to 5 inches wide.
Read more: How to Grow Basil? Learn How to Plant This Culinary Herb in your Garden
Best and Worst Rutabaga Plant Companions
Over the long period of growing rutabaga, I have realised that the plant does not grow well with every plant. Here are some of the best and worst companions of the rutabaga plant.
When I think of growing the best rutabaga companions, the first few plants that come to my mind are aromatic herbs like rosemary, thyme, mint, and sage; alliums like garlic, onions, chives, and scallions; leafy greens like spinach and lettuce; calendula and nasturtium; and peas. Here are the reasons why I prefer planting these plants with rutabaga:
- Herbs are great companions that repel pests like aphids, thrips, and flea beetles.
- Alliums help repel root maggots and other soil pests.
- Leafy greens help shade soil to retain moisture.
- Peas work as nitrogen boosters, providing enough nutrients to the rutabaga.
The worst companions for rutabaga plants include other plants from the Brassica family like cabbage, broccoli, cauliflower, turnips, and kale. This is because these vegetables share the same pests and diseases and might also take all the nutrients from the soil.
Other worse companions for rutabaga are heavy feeders like corn, large tomatoes, squash, and potatoes. These vegetables are heavy feeders and might damage the rutabaga roots.
Did you know?
Rutabagas were originally used as animal fodder, but later humans recognised their nutritional value and started consuming the root and leaves.
Read more: Yam Vs Sweet Potato: Discover the Difference Between Yam And Sweet Potato
Common Pests and Diseases Associated with Rutabaga Plants
Rutabaga can attract several pests and diseases like aphids, black rot, cabbage root maggots, clubroot, and many more. Here is the list of pests and diseases that can trouble your rutabaga plant:
| Pests and diseases | Solutions |
| Aphids, Cabbage root maggots, Flea beetles, and Wireworms | Growing companion plants like aromatic herbs and alliums helps repel pests. If your vegetables still attract pests, use pesticides like neem oil or knock them off with a strong water spray. Wireworms can also be removed by removing plant debris and providing good drainage. |
| Clubroot | Clubroot is a fungus that appears as yellow leaves or swollen roots. In order to avoid the plant getting destroyed by clubroot, maintain the soil pH at around 7 and rotate crops. |
| White rust | White rust is a fungus that can be spotted as chalk-white blisters on the plant leaves. To remove them, destroy the infected plant and choose resistant varieties. |
Quick tip
Crop rotation helps the soil regain its nutrients. Do not repeat growing the same crop for more than two seasons.
Takeaways
Rutabaga is a biennial, low-maintenance plant that is easy to grow and takes around 90 days to mature. The vegetable is highly nutritious and rich in fibre.
Rutabaga grows best with onions, rosemary, peas, and many more herbs and alliums. Avoid growing them with heavy feeders and vegetables that belong to the same family.
People often consider buying them from supermarkets, but when grown at home, you know that it is organically grown with love, and therefore it enhances the taste of the vegetable.
Happy growing!
FAQs
How to grow a rutabaga?
How big is a rutabaga?
Rutabaga grows around 0.5 to 1.5 meters tall and wide.
How to cultivate rutabaga?
Rutabaga should be grown in full sunlight and fertile soil.
Sources
Rutabaga: Britannica
Latest Blog